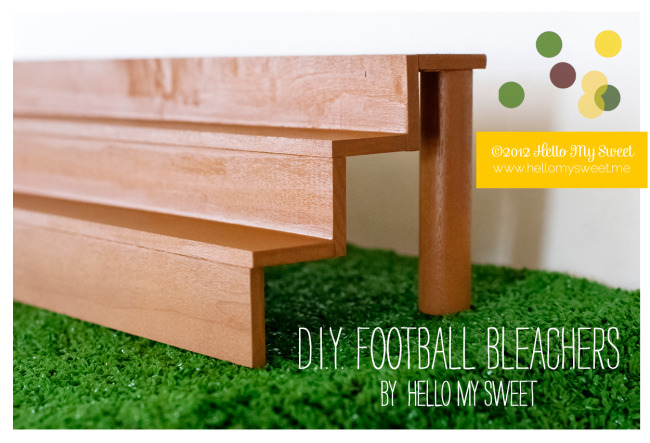
To go along on top of our super cool DIY football table for our Vintage Football Party, we needed some equally super cool football-ish decor. And what do you normally find at just about every football field? Bleachers of course! This DIY tutorial will focus on some really easy to assemble bleachers that you could use purely as a decorative touch. Or as we did, it being an integral part of plating our delicious food-stuffs.
As with our last DIY post, let us assemble our materials. For the bleachers themselves, we used the ever popular (here at Hello My Sweet) ¼”x2”x4’ poplar wood strips and a small section of a ⅞” wooden dowel. In hindsight, these bleachers would have benefitted from using a wider wood strip than 2” however. Two inches doesn’t leave much room for placing objects on the finished stair, so in the future we would recommend at least 3” wide strips.
You will need:
- Loctite adhesive
- (6) ¼”x3”x4’ Wood Strips (at least 3” wide, 4” might be even better!)
- ⅞” Wood Dowel
- set of clamps
- Krylon Brown Boots spray paint
- wood cutting tool ( jigsaw, handsaw )
- ruler or measuring tape
- pencil

Step One:
Cut the wood strips in half. This will leave you with (12) 2 ft. pieces. If you don’t have access to power tools, you can usually have the home improvement store cut the wood for you. Keep in mind though, there might be an additional charge for this. 12 pieces will build a total of 2 sets of bleachers. 
Step Two:
Take 2 pieces of wood and arrange them in an “L”, this will give you the basic shape of a step. Working with your Loctite, put some of the adhesive on the leading edge of poplar strip, then just press it against the other strip, making sure to make the “L” shape. Work on a surface that you don’t mind getting some adhesive on, or laying down something over the surface you’ll be working on. The nice thing about Loctite is that it can be cleaned up relatively easy with a cloth and some warm water. You are going to repeat this process until you have 6 stairs. I found that I could make 3 “L” shapes, for one set of bleachers, then set them aside and work on the next set of 3. Once you have let the adhesive dry for several hours, take your 3 “L” shapes and arrange them as pictured.
Step Three:
Use some more Loctite to adhere the shapes together and then use the clamps to make sure your bleachers stay in that position while they dry. Let the whole thing dry overnight.
Step Four:
It’s time to add some supports to your bleachers to make sure they stand upright. If you stand your bleachers up with one hand and take a ruler or measuring tape with the other (or have another person help you with this part) then you can measure the distance from the bottom of the topmost woodstrip to the top of whatever surface it’s on. This will give you the measurement of how high your supports need to be. In my case, it was approximately 4 inches high. Your measurements may vary, however.
Step Five:
Once you have your measurement, take the ⅞” wooden dowel and cut 4 pieces to length. This will yield 2 supports per set of bleachers. Once you know your bleachers have had ample time to dry, turn them over and glue 1 support at each corner. Alternatively, you could drill holes and screw the supports in place, but I was attempting to see how difficult/easy it would be to construct these without using a drill and screws. In hindsight, it might actually be faster to use screws instead of an adhesive, since you have to let adhesive dry, but I know some people don’t have access to power tools or have an aversion to using them. Again, let the adhesive dry for a few hours before turning your bleachers back right side up.

Step Six:
They are now ready for painting if you so choose. We decided to go with a color from Krylon call “Brown Boots.” If you do choose to paint AND you decide to use food on them, make sure that nothing edible comes in direct contact with the spray paint. If you can’t get around that, and you still need to put something on the wood directly, then you can cut strips of wax or parchment paper and set them down underneath your food items. You could also opt to apply a food safe poly finish as well.


