A Guide to Increasing Your Creativity and Saving Money

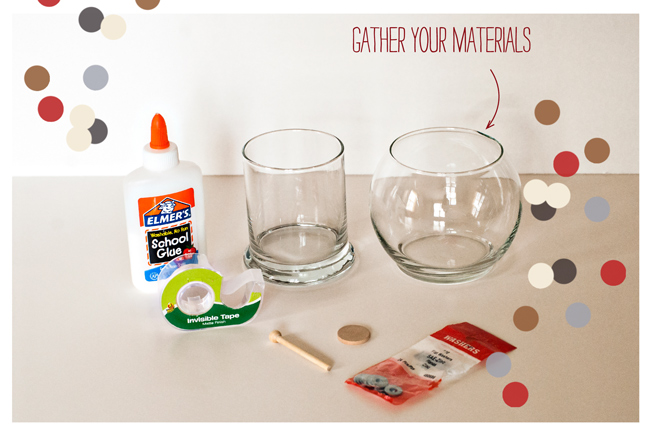
Today we wanted to talk a little bit about how to increase your creativity level when planning and designing a dessert table or party. As most of you already know, we prefer to keep our parties and tables on a budget. Which means of course that being creative about how you spend money is absolutely paramount.

We make many of the things you see featured on our Dessert Tables. Some of them are things we found and simply redecorated. Others were objects meant to serve a completely different use, so when we use them to do something other than what they were originally intended for, we call that repurposing.

While these concepts of restyling or redecorating and repurposing is something we utilize a lot now, it wasn’t always the case. We used to spend a lot more time trying to find the perfect item, ready to go on the table, without alteration. If you are a budget savvy party planner we urge you not to do this. First of all, it is a time-consuming process, and who couldn’t use extra time when planning a party? Second, it is costly. It costs you more money to find something ready to use than it does to find something you can re-style or re-purpose. Of course if you are in a huge hurry you might find that a DIY is not an option. In that case we urge you to plan ahead more often and try to build in time for projects!

Here is a creative example of repurposing. Jason created this Space Helmet out of some very ordinary objects. He wanted a very specific look for it, retro-futuristic, large and bubble like. Now how hard would it be to find a helmet like that and not spend a fortune on it? Even if you did find one, it would be an antique and would cost at least a few hundred dollars. Our helmet cost us about $7 dollars to make. That figure includes the cost of a Slurpee, which is about $2.50.


This is a great example of restyling. Jason envisioned several Ray-guns on our Retro Space Dessert Table. Do ray-guns actually exist outside of the movie industry? I’m not sure, but I don’t think so. That would make them very hard to find. What he did find however were some squirt guns at Dollar Tree. The body style was spot on, but the color was all wrong. A little DIY project later and we had restyled those squirt guns to fit our theme perfectly. Oh, and they were only $.33 each. And we used materials we already had to do it.


Can you tell who the visionary is in this outfit? Haha. It isn’t me. Jason has that knack for figuring out how to make things work out the way he wants them to.

Here are some tips on finding objects that will work for your project:

  • Look beyond what something is already and further on to what it could be instead.
  • Search your house first. We have constructed many a DIY out of random objects from our kitchen pantry.
  • Soda Bottles and Food Containers have been pivotal for us. Jason likes to examine food containers at the grocery store when we shop to find the right shapes that he needs to construct.
  • Never count out the dollar stores. It is the first place we go when we look outside our home for something. I can’t tell you how many times we have found exactly what we were looking for at a dollar store. Seriously. They have the most random items sometimes. Hardware stores are also a treasure trove.
  • If it can be spray painted or hot glued, it can be turned into something else.
  • Foamcore Board and Poster Board are extremely useful materials, and you can get them at the dollar stores. They are not just for school projects!


We hope this information helps when it comes to planning and saving some money too!

If you have any questions, suggestions or helpful tips of your own, please do share them in the comments below!


Sweet DIY: Retro Ray-gun Tutorial

Welcome back to our humble blog today!

We have another simple, and affordable DIY tutorial up our sleeves to show you today. This go round we are going to make some Dollar Tree squirt guns magically transform into Retro Ray-guns. This project is all about the vision to see what an objects potential is. Jason is really skilled at this. He can see something in the store as a completely different object down the road. All we required were a few crafting materials we already had at home, and a package of squirt guns, which cost $1 per three pack. 

Let get to it!

For this project you will need:


  • Spray Paint (or Craft Paint & Applicator)
  • Sandpaper
  • Plastic Squirt Guns
  • Painters Tape
  • Newspaper
  • Spray Polyurethane

Step One: Decide what area of your ray-guns you want to paint. We chose to completely cover two of ours, and leave one blue and just paint the bolt on the side of it. You will want to mask off the trigger area just to make sure it doesn’t get stuck in place with paint. Use your painters tape and newspaper to mask. 

Step Two: Rough up your painting area with a fine grit sandpaper. This will help ensure your paint adheres well to the plastic. The shiner and smoother the plastic, the more difficult the bond can be. Once you are done sanding, be sure to wipe the ray-guns down to remove any loose debris that would prevent the paint from sticking as well.

Step Three: Unleash your inner paint artist and go town on those ray-guns! We tried to achieve a nice retro feel by using some matte metallic spray paint and an accent of dark red here and there to match the overall color palette of our Retro Space Dessert Table. Allow your paint to dry thoroughly and then apply a polyurethane spray coat as well to keep the paint from scratching of and protect little hands too!

We used our Ray-guns as decoration, but you could easily hand them out to your guests to have a super fun squirt gun fight, or even as a party favor or gift!

What do you think about this project?

We’d love to hear your comments below!

Two Little Birds, Sit By My Doorstep

Two doves to be exact.

The first, nestled safely in her nest. We have been watching her build and nest her eggs for a few weeks now, but we still haven’t heard any baby birds!

And what about the second Dove? Well that one (not a live animal!) was wrapped up safe and sound in a box on our porch. A nice little surprise I had forgotten was on its way to me. It was a bottle of Dove® VisibleCare™ Toning Crème Body Wash with NutriumMoisture™.

Several weeks beforehand I signed on to product test for Dove®. I thought “What can it hurt? I like body wash. And if it really works, well then that is a double bonus for me! Plus, I don’t have to buy bodywash for a month.” So out of the box came the big bottle of Dove® VisibleCare™ Toning Crème Body Wash, and into my shower it went. 

Let me tell you a little something about myself, I am a skeptic. I don’t buy products at the store simply because they say they are going to do this or that for me. I want to KNOW that it really works. Likewise any product that promises to do something for me like help promote skin’s elasticity and strength, and actually improve the look of my skin, had better work, or else I am not going to pass along the message. I don’t believe in falsely advertising anything. Now that that is out of the way, I will continue.


Dove® VisibleCare™ Toning Crème Body Wash advertises that it will help promote skin’s elasticity and strength, as well as actually improve the look of your skin. It combines the best of Dove® technology into a luxurious experience for beauty seekers. Sounds good right? So here is the deal, this body wash will give you visibly more beautiful skin in just one week. One week is all it takes. And if you stick with it and use it every day until the bottle is all gone (which should last you several weeks) you will really see a difference.

I have used Dove® VisibleCare™ Toning Crème Body Wash every day since June 25th. Today is July 18th, so that means I have been using it for 24 days now. The first thing I noticed about my skin was that it felt properly moisturized. I am going to credit this to the high concentration of NutriumMoisture within the body wash. The second thing I noticed was after about a week. My skin felt significantly softer and looked healthier overall. Toning Crème is the product name, and tone is what it does! I am a someone who has dry skin just about all the time, no matter what time of year it is, so for me this was a welcome improvement!

I will be 32 next month, and let me just tell you how much your skin changes in a 5 year period between the end of your twenties and the beginning of your thirties. I hav noticed a general decline in the elasticity of my skin. Things are a little less taught than they used to be. I was really pulling for this Dove® VisibleCare™ Toning Crème Body Wash to help me feel my best, my most beautiful and more confident about showing off my skin. After three weeks of using this body wash, I am sold. It smells wonderful, making the experience of using it that much better. It feels great, lathers like crazy, and a little bit goes a long way, which is nice for the budget conscious like ourselves. But most of all it does what it says it will. It really does improve the look of your skin. 

Visit Dove® VisibleCare® to get a coupon for $1 off!

I urge you to try it out for a month and see what it can do for you. This revolutionary new product line comes in three different Dove® VisibleCare variants: Toning Crème Body Wash which helps to promote skin’s elasticity and strength, Renewing Body Wash which nourishes and replenishes skin and Softening Body Wash which softens skin and dry spots. Give it a try and let us know what you thought about it!


Enter to win one of two $500 Spafinder gift certificates!

NO PURCHASE NECESSARY

COMMENTS TO THIS POST ARE NOT SWEEPSTAKES ENTRIES. PLEASE SEE BELOW FOR ENTRY METHODS FOR THIS SWEEPSTAKES.

You may receive (2) total entries by selecting from the following entry methods:

a) Follow this link, and provide your email address and your response to the Promotion prompt

b) Tweet (public message) about this promotion; including exactly the following unique term in your tweet message: “#SweepstakesEntry”; and then visit this link to provide your email address and the URL to that Tweet.

c) Blog about this promotion, including a disclosure that you are receiving a sweepstakes entry in exchange for writing the blog post, and then visit this link to provide your email address and the URL to that post.

This giveaway is open to US Residents age 18 or older. Winners will be selected via random draw, and will be notified by e-mail. Winners will have 72 hours to claim the prize, or an alternative winner will be selected.

The Official Rules are available here.

This sweepstakes runs from 7/18/2012 - 8/22/2012

Be sure to visit the Dove® VisibleCare™ Crème Body Wash brand page on BlogHer.com where you can read other bloggers’ reviews and find more chances to win!

Sweet DIY: Space Helmet Candy Dish Tutorial

Today’s DIY project and tutorial is so easy it is going to blow your mind. That is if the cost of today’s DIY project and tutorial doesn’t first! We are going to show you how to assemble these super fun and creative Space Helmet Candy Dishes that were featured on our Retro Space Dessert Table last week. If you happened to miss that post you are going to want to click that little link up there in the previous sentence and check it out. Jason really out-did him self with the creative ideas this time! 

First things first, let’s talk about cost. Above you will see all of the materials used for this project. The Glass candle holders, (yes they are candle vessels) were found at Dollar Tree, so that is $2 bucks for the main part of the candy dish. The next part is optional and completely customizable. So you could quite literally not spend any more money at this point.

We used some simple wooden craft pieces and metal washers to create a “retro antenna” for the top of the “space helmet”. You can skip that step if you want, or you may find some other bits and pieces you like to use better. Ours was a mish-mash of found objects that combined into pure awesome. If you were to purchase those bits and bobs though, you would only be spending just a few bucks. We also chose to paint our antenna with some gold spray paint we already had on hand. Again, your choice, decorate however you see fit!

Here is the official material list as we completed the project:

  • Glass containers, one Cylindrical, one Globe - make sure to test them out before you bring them home to see if they fit easily together and apart.
  • Wooden Pieces - one for antenna, one for base - our antenna had a ball already attached at one end
  • Small Washers - make sure these fit onto your wooden antenna piece
  • Tape
  • Glue - Craft, Hot, Super
  • Spray Paint (or craft paint and applicator)


Step One: Like we mentioned in the material list, you want to make sure your two glass pieces fit nicely together without being too snug to fit together/apart. We recommend testing this BEFORE you bring them home :)

Step Two: If your washers weren’t quite the perfect fit for your wooden antenna piece, you will need to add a bit of cushioning to make them fit snugly around. We used tape and wrapped it around to make things fit nicely together. Thread your washers on, then spread your glue in between and around so that they are sure to stay put. Let this dry before you move on. When your antenna is ready, go ahead and glue it to the small wooden circle, and again let dry before moving on. We used Elmer’s glue but in hindsight super glue might have been easier, we’ll let you decide!

Step Three: Decorate it! As we said above, we sprayed our antenna with gold spray paint and let it dry. You could just as easily use a metallic craft paint or even cover it in glitter if you want it to sparkle! Once your decoration method is dry, it is time to attach the antenna to the helmet top. The helmet top of course is the bottom of the glass globe. We used hot glue to do this because we wanted to make sure our efforts were temporary and that we would be able to re-use the glass pieces again in the future. Hot Glue doesn’t bond well to glass and usually pops right off with the tiniest of force, so if you want your more permanent you may need a stronger adhesive.

And there you have it! A super duper inexpensive and easy way to transform some very plain jane glass containers into something a lot more interesting for your party!

If you have any questions or suggestions regarding this tutorial please do not hesitate to leave us a comment below!