Sweet Inspiration: Fruit Crates

Often times we find our inspiration in the strangest places.

Lately we’ve been salivating over some pretty creative and very vintage designs hailing from the sides of wooden fruit and vegetable crates.

If you have never visited the website Box of Apples, you are missing out.

We came across this treasure trove of artwork a few months ago while designing a speakeasy printable set for a wedding. We needed 1930s era advertising to complete the “program” which was designed to look like a newspaper from the prohibition era. Among our googling we found Box of Apples, and our love of crate ads was established.

Feast your eyes on these lovely works of art:

Meteor Lemons, c. 1930sOrbit Oranges, c. 1930s

We really like the spacey look of these labels. Also, it is fun to imagine these fruits sailing past your head on their way down from space, just like real meteors! (Sarcasm anyone?)

King Pelican Iceberg Lettuce, c. 1920s

Large green pelicans have been floating around in my head ever since we saw this one. He is such a stately bird with his little crown of gold. Almost makes me want to eat lettuce. Almost.

Killer Vegetables, c. 1950s

And nothing says eat your veggies quite like a Killer rooster. It’s almost as if he is willing you to be a vegetarian, in a brazen attempt at self “poultry” preservation.

Western Hoe Vegetables, c. 1940sAnd here are a few that brought out the immature in us. “Giggles.” They said hoe.

Hustler Pears, c. 1920sWho knew pears could be so controversial, or so scantily clad?

Otello Oranges, c. 1950sThis gent seems like he is a bit alarmed. Maybe it is because those oranges are flying right at his head. Or perhaps it is because they are half the size of his head? 

You can also find another section on the Box of Apples website called Plan59.

This area features restored advertisements as well, equally entertaining and also available for purchase.

Here are a few of our favorites, for obvious reasons:

Bread’s better ‘cause it’s fresher in Cellophane (1954)

Baked Ham: featured this month in good eating places everywhere! National Restaurant Association, May 1957

The Joy of Good Eating, 1952Who ever thought these kiddies would be good at selling? Scary.

Where do you find your sources of inspiration? Share them with us!

Sweet DIY: Stretched Canvas Art

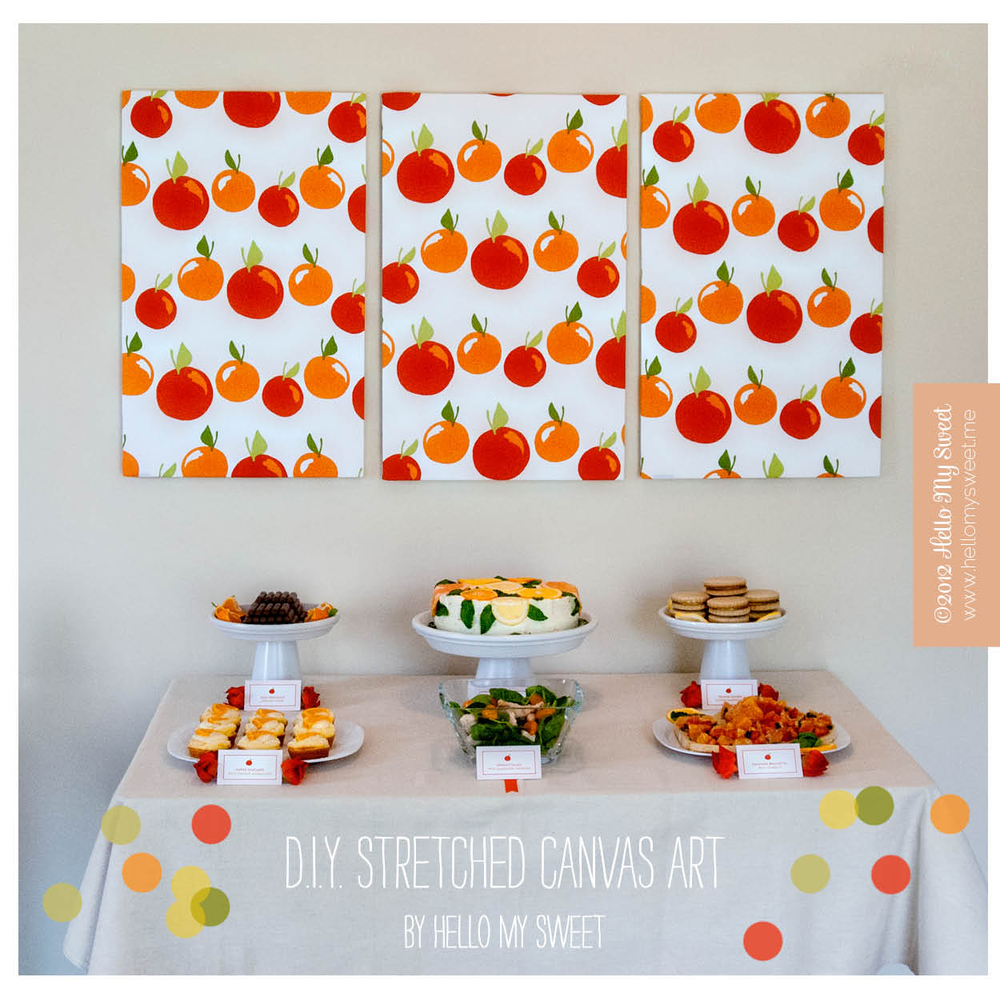
Today we want to show you how easy it can be (and inexpensive of course) to create your own Stretched Canvas Artwork. In our example you see that we used three of these pieces to create a modern and symmetrical backdrop for our Citrus Brunch buffet. However, you are not merely limited to backdrops, oh no, no. This technique could be used to beautify any space with stretched canvas art.

I personally was really excited with the results of this little experiment. So much so that we plan to use these in our kitchen now as wall art! I may even use one as a pin board as well for notes and reminders and such. Since the frame is backed with foamcore, it is perfect for push pins or straight pins.

We are going to demonstrate for you how to build a frame and stretch the fabric across it. Ours had specific dimensions due to the fabric we chose, which were actually a 3-pack of kitchen towels from Target. So they were already sized and we built our frame to accomodate that size. However you could pick any fabric you want and make your frame any size you want as well, using our technique as a guide. Take notice that NO NAILS or MITRE BOXES are required for this project. Super duper easy.

Step One: Lay your foam core down onto the fabric you chose. Adjust so that the foam core rests on top of the fabric with at least 1” of fabric extra on each side. Then cut the excess fabric away. You should now have a piece of fabric with 1” or more overhang all the way around each side of the foam core.

Step Two: Measure the width and height of your foam core. Mark your wood strips accordingly so that you have two pieces to cut as your width. Subtract two inches from your height measurement and mark two more pieces to cut at that final measurement as well. Cut your wood pieces. Our foam core is 16”w x 24”h, so we had two wood pieces at 16”w and two wood pieces at 22”h. (See photo for example.)

Step Three: Assemble your frame by laying our your wood pieces on top of the back side of the foam core. Lay your width pieces down first, they should stretch equally from edge to edge of the foam core at the top and the bottom. Then lay your height pieces down, they should meet up with the top and bottom pieces you already have and fill in the gap on the left and right sides of the foam core, completing the frame. Once you have everything as it should be, secure it in place with your loctite adhesive. (Photo example #1 below.)

Step Four: Place your fabric wrong side up and place your finished frame on top, wood side up, foam side down. Position it as you did when measuring in Step One. You should have your frame centered with at least 1” of extra fabric on all sides. (Photo example #2 above.)

Step Five: Using your staple gun to secure it, careful pull your fabric tight over the center of one side of your wood frame and staple it there. Do this for all four sides, stretching your fabric carefully and evenly and tightly across the frame, secure it with one staple. (Photo example #3 above.) You should now have your fabric secure to the frame. Proceed by stapling the sides the rest of the way, working from the stapled center point out toward the corners on all sides, leave the corners for last. When you are ready to finish the corners, tuck the excess fabric in on the sides, then pull the corner tightly toward the center of the foam core and staple to the wood frame. (Corner detail example below.)

Step Six: (Optional) You can add a picture hanger to the top of your frame to make hanging easier. 

Well there you have it! Stretched Canvas Art without a hammer, nails or mitre box. (Jason is pretty genius right?) Imagine the possibilities. I bet you’ll never overlook that awesome fabric pattern online or that cool vintage patterned table cloth you spotted again. Now you have a reason to take them home and make them into your own wall art!

The added bonus here, that I mentioned earlier already, is that you could use these as pin boards as well. In fact I have one above my desk that we made in similar fashion that I use as a french message board. We added two extra things for that, a layer of batting between the fabric and foam core, and ribbons interwoven on the front side.

Tell us what you think! What do have lying around just waiting to be made into canvas art?